Is the Mirror or Camera More Accurate? The Truth About How People See You
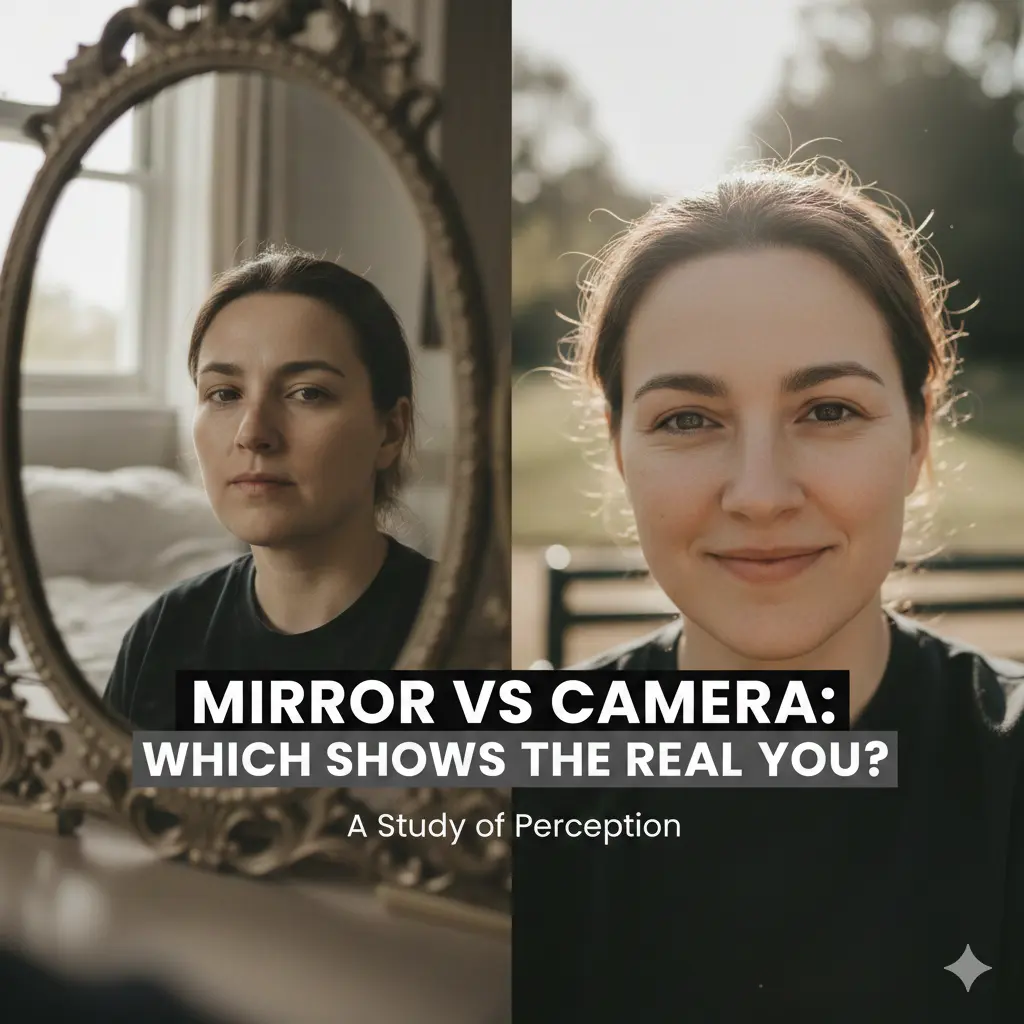 Mirror vs Camera
You look in the mirror and think, "Not bad." Your hair looks good. Your skin looks clear. You feel confident enough to take a selfie.
Then you see the photo.
Who is that? Your nose looks huge. One eye seems higher than the other. Your face looks weirdly lopsided. You delete it immediately. Then you take 15 more photos—and delete all of them too.
Sound familiar? You're not alone. Millions of people experience this exact frustration every day, wondering: "Which is the real me—the mirror or the camera?"
Here's what this guide will give you: a clear, scientific explanation of why mirrors and cameras show different versions of you, which one is actually more accurate, and most importantly—5 practical steps to finally see (and accept) your true face. No more guessing. No more anxiety. Just answers.
Part 1: Why Do You Look Different in Photos vs Mirror?
Let's break down the three reasons why your mirror reflection and camera photos look like two different people.
1.1 The Mirror Flips Your Face (Lateral Inversion)
Here's a fact that might surprise you: you've never actually seen your real face in a mirror.
Mirrors create what scientists call "lateral inversion"—everything is flipped horizontally. Your left eye appears on the left side of the mirror, but in reality, it's on the right side of what others see.
Why does this matter? Because no face is perfectly symmetrical. Your left eyebrow might sit slightly higher. Your smile might curve more on one side. Your nose might tilt a tiny bit.
In the mirror, you see these features reversed. In photos, you see them as they actually are. And because you've spent your entire life looking at the flipped version, the real version looks... wrong.
Quick test: Take a selfie, then flip it horizontally using any photo editor. Does the flipped version look more "normal" to you? That's because it matches what you see in the mirror.
1.2 Your Phone Camera Lies to You (Lens Distortion)
 Front Camera Distortion Effect
This is the part most people don't know about.
Front Camera Distortion Effect
This is the part most people don't know about.
Your phone's front camera uses a wide-angle lens, typically around 24-28mm. Wide-angle lenses are great for fitting more into the frame—but they're terrible for faces.
Here's what a wide-angle lens does to your face:
- Your nose looks 30% larger than it really is
- Features closer to the camera appear bigger
- Your face looks wider and flatter
- One side may appear larger if you're even slightly off-center
A study from Stanford University found that photos taken at close range with wide-angle lenses distorted facial features so significantly that plastic surgeons reported patients coming in with concerns about features that looked completely normal in person.
The closer you hold your phone, the worse the distortion gets.
That's why professional portrait photographers use 50-85mm lenses and stand 5-8 feet away from their subjects. They know that distance and focal length dramatically change how a face appears.
1.3 Your Brain Prefers What It Knows (Mere-Exposure Effect)
Here's the psychological piece of the puzzle.
Psychologist Robert Zajonc discovered something called the "mere-exposure effect": humans prefer things they see frequently. The more you're exposed to something, the more you like it.
You see your mirror reflection dozens of times per day. You see photos of yourself... much less often. Your brain has developed a strong preference for the mirror version simply because it's more familiar.
In one famous study, researchers showed people two versions of their photo—one normal, one flipped. Most people preferred the flipped version (like their mirror image), while their friends preferred the normal photo.
So when you think you look "ugly" in photos, part of that reaction is simply unfamiliarity, not reality.
1.4 The Answer: Which Is More Accurate—Mirror or Camera?
Let's be direct:
| Mirror | Camera | |
|---|---|---|
| Flipped? | Yes (laterally inverted) | No |
| Distortion? | No | Yes (especially front camera) |
| 3D or 2D? | 3D (real depth) | 2D (flattened) |
| Lighting? | Real-time, dynamic | Fixed moment |
| Movement? | Shows expressions naturally | Freezes one moment |
The truth: Neither is 100% accurate.
- The mirror shows a flipped version of you with accurate proportions
- The camera shows an unflipped version but with lens distortion
If you want to see what others actually see, the closest approximation is: a photo taken with the rear camera, from about 5 feet (1.5 meters) away, at eye level.
This eliminates most wide-angle distortion while showing the non-flipped version of your face that others see in real life.
Both mirror and camera have limitations. If you want to understand your facial balance objectively, learn more about what facial symmetry actually means.
Part 2: How to See Your True Face — 5 Actionable Steps
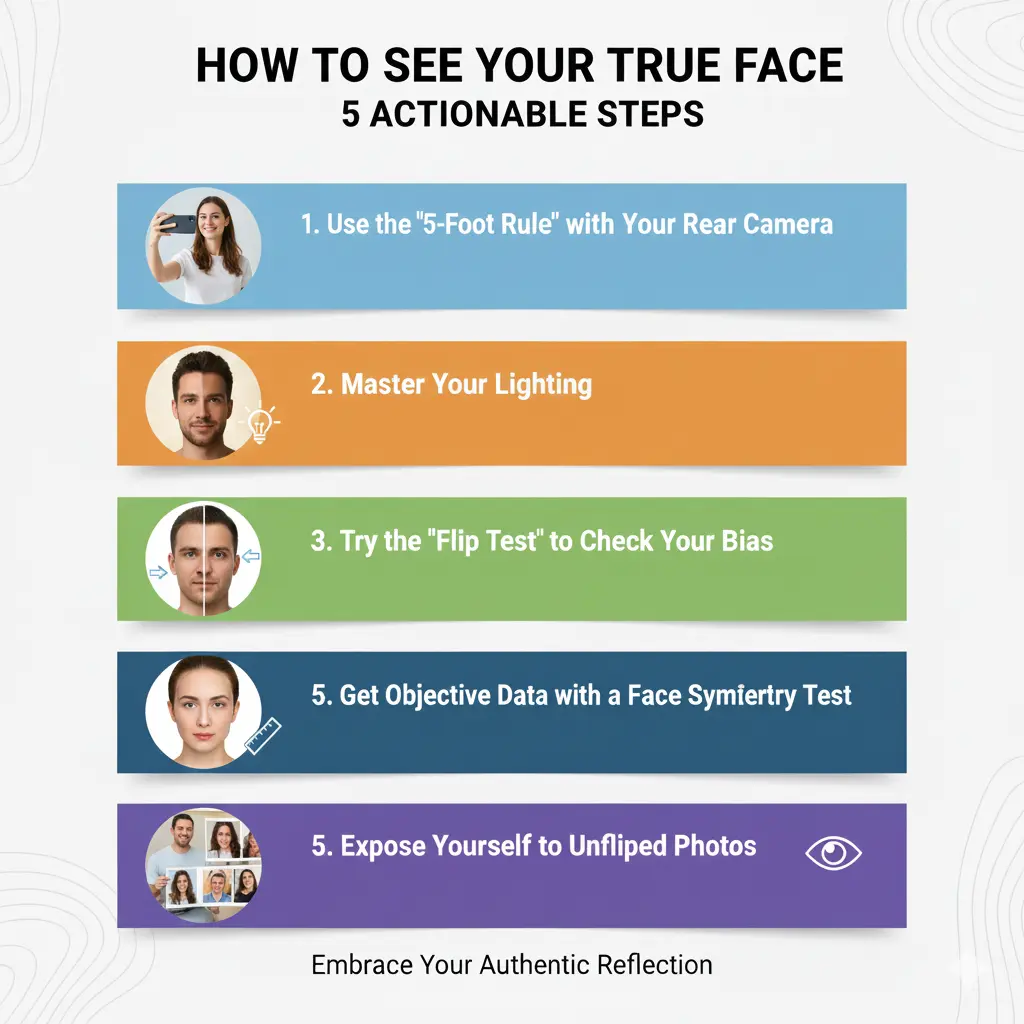 5 steps to see your true face
Knowing the science is helpful. But what can you actually do about it? Here are five practical steps to see a more accurate version of yourself.
5 steps to see your true face
Knowing the science is helpful. But what can you actually do about it? Here are five practical steps to see a more accurate version of yourself.
Step 1: Use the "5-Foot Rule" with Your Rear Camera
Stop taking close-up selfies with your front camera. Instead:
- Ask a friend to take your photo (or use a tripod with timer)
- Use the rear camera (better lens quality, less distortion)
- Stand 5-6 feet (1.5-2 meters) away from the camera
- Keep the camera at eye level—not above or below
This setup mimics how other people actually see you in conversation. The photo won't look like your mirror reflection (it's not flipped), but it will look like you—the version everyone else knows.
Pro tip: If you must use the front camera, extend your arm fully and use the 2x zoom. This reduces distortion significantly.
Step 2: Master Your Lighting
Bad lighting creates shadows that exaggerate asymmetries and make your face look uneven. Good lighting is your friend.
Best lighting setup:
- Natural daylight facing you (stand facing a window)
- Light source at eye level or slightly above
- Soft, diffused light (cloudy days are perfect)
Avoid:
- Overhead lighting (creates under-eye shadows)
- Lighting from below (makes everyone look strange)
- Harsh direct sunlight (creates hard shadows and makes you squint)
One simple change in lighting can make a bigger difference than any filter.
Step 3: Try the "Flip Test" to Check Your Bias
This exercise helps you understand how much of your photo discomfort is just unfamiliarity.
- Take a front-facing photo
- Use any photo editor to flip it horizontally
- Look at both versions side by side
What to notice:
- If the flipped version looks "better" to you, your brain is just more comfortable with the mirror-like orientation
- If both versions look equally fine (or equally "off"), you may have genuine asymmetry concerns worth exploring
This test separates "I'm not used to this" from "There's actually something I want to address."
Step 4: Get Objective Data with a Face Symmetry Test
Your feelings about your face are subjective. They change based on mood, lighting, and which photo you just saw. What doesn't change? Measurements.
A Face Symmetry Test analyzes your face using AI to measure 68+ facial landmarks. You'll get:
- Your overall symmetry percentage
- A breakdown of which areas are most/least symmetrical
- Objective data you can compare over time
This removes the guessing game. Instead of wondering "Is my face actually uneven?"—you'll know. Most people discover their symmetry falls in the normal range (80-95%), and their "problem" was mostly camera distortion and unfamiliarity.
Try it now: Upload a clear, front-facing photo and get your results in 30 seconds.
Step 5: Expose Yourself to Unflipped Photos
If unfamiliarity is part of the problem, the solution is simple: become more familiar with the unflipped version of yourself.
- Set your phone to not mirror your front camera (many phones have this setting)
- Look at photos others have taken of you more often
- When you see a photo you dislike, don't delete it immediately—look at it for 30 seconds
Research shows that with repeated exposure, your preference shifts. After a few weeks of seeing more unflipped photos, they'll start to look as "normal" as your mirror reflection.
Part 3: Real Story — How Emma Stopped Hating Her Photos
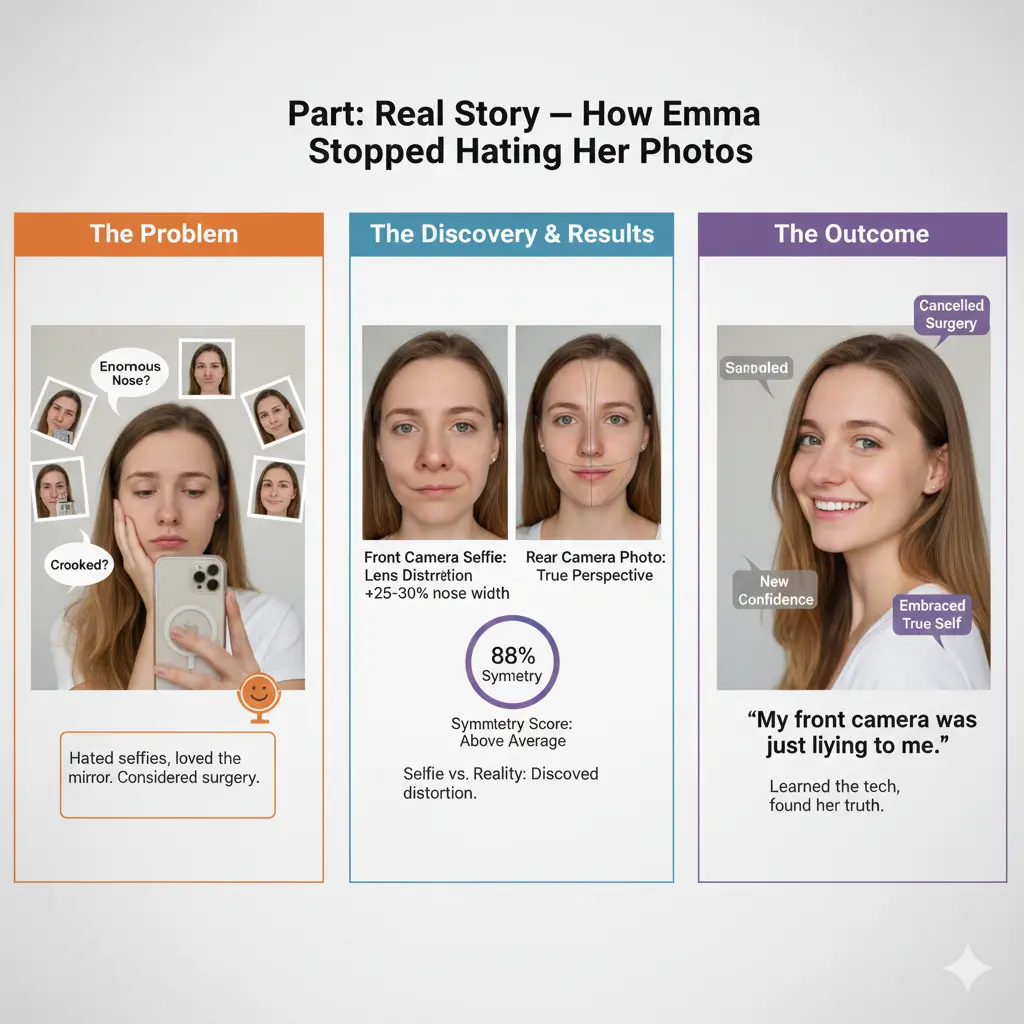 Real Story - How Emma Stopped Hating Her Photos
Let me share a case that ties this all together.
Real Story - How Emma Stopped Hating Her Photos
Let me share a case that ties this all together.
The Problem:
Emma, 26, had spent years avoiding photos. She loved how she looked in the bathroom mirror but hated every single selfie. "My nose looks enormous in photos," she told me. "And my face looks crooked. But in the mirror, I look fine. I started wondering if I needed a nose job."
The Discovery:
Before consulting a plastic surgeon, Emma decided to investigate. She:
- Took a photo with her front camera at arm's length
- Took another photo with her rear camera from 5 feet away
- Uploaded both to a Face Symmetry Test
The Results:
- Front camera selfie: Her nose appeared 25-30% wider due to wide-angle distortion
- Rear camera photo: Her nose looked proportional and normal
- Symmetry score: 88%—well above average
The "crooked face" she saw in selfies was mostly lens distortion combined with unfamiliarity with her unflipped face.
The Outcome:
Emma cancelled her plastic surgery consultation. "I realized I was about to spend thousands of dollars fixing a problem that only existed in bad selfies," she said. "The rear camera photo looked almost exactly like what I see in the mirror—just not flipped."
She now only takes photos with proper distance and lighting. And she's started showing her left side more in photos—something she'd avoided for years based on distorted selfies.
"I'm not ugly. My front camera was just lying to me this whole time."
Part 4: 3 Mistakes That Make You Look Worse in Photos
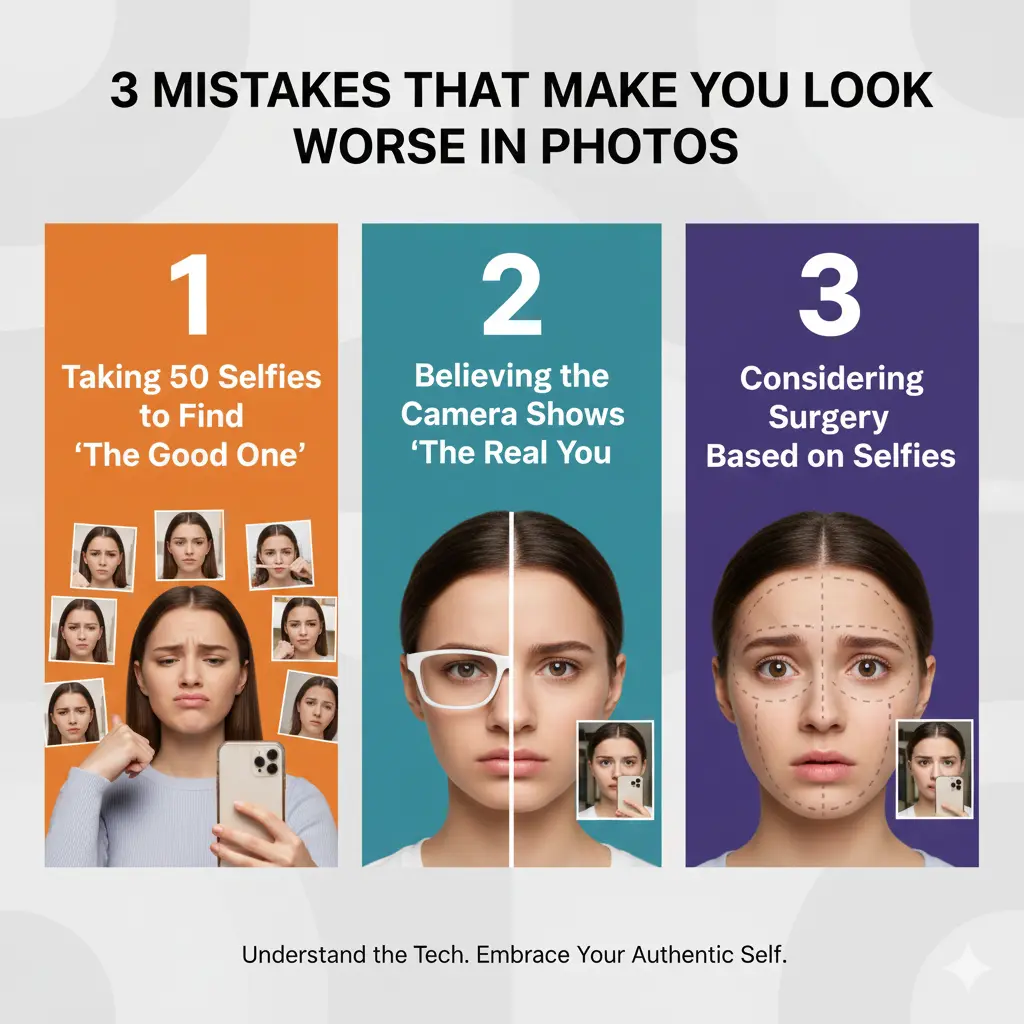 3 mistakes make you worse in photos
Avoid these common errors that amplify the mirror-vs-camera problem.
3 mistakes make you worse in photos
Avoid these common errors that amplify the mirror-vs-camera problem.
Mistake 1: Taking 50 Selfies to Find "The Good One"
The problem: You hold your phone close, take endless photos, analyze each one, and spiral into frustration.
Why it backfires: Every close-up selfie has the same lens distortion. You're not finding a good angle—you're just getting more anxious.
The fix: Change your tool, not your angle. Use the rear camera from proper distance. One good photo beats 50 distorted ones.
Mistake 2: Believing the Camera Shows "The Real You"
The problem: You assume photos are objective truth and mirrors are deceptive.
Why it backfires: Photos are highly distorted by lens type, distance, lighting, and the fact that they freeze one millisecond of your constantly-moving face. They're not more "real" than mirrors—they're differently flawed.
The fix: Accept that no single image perfectly captures how you look. You are a 3D, moving person. Both mirrors and cameras are 2D approximations with different tradeoffs.
Mistake 3: Considering Surgery Based on Selfies
The problem: You see something "wrong" in photos—a big nose, uneven eyes, crooked jaw—and start researching procedures.
Why it backfires: Plastic surgeons report that many patients come in concerned about features that look completely normal in person. The "flaw" only exists in wide-angle distorted images.
The fix: Before making any permanent decisions, understand the difference between real asymmetry and camera artifacts. Get objective data first. Read: Why Is One Side of My Face Fatter? to understand whether your concern is real or camera-created.
If you discover real asymmetry you want to address, there are many options available. Read: How to Fix Face Asymmetry for a complete guide.
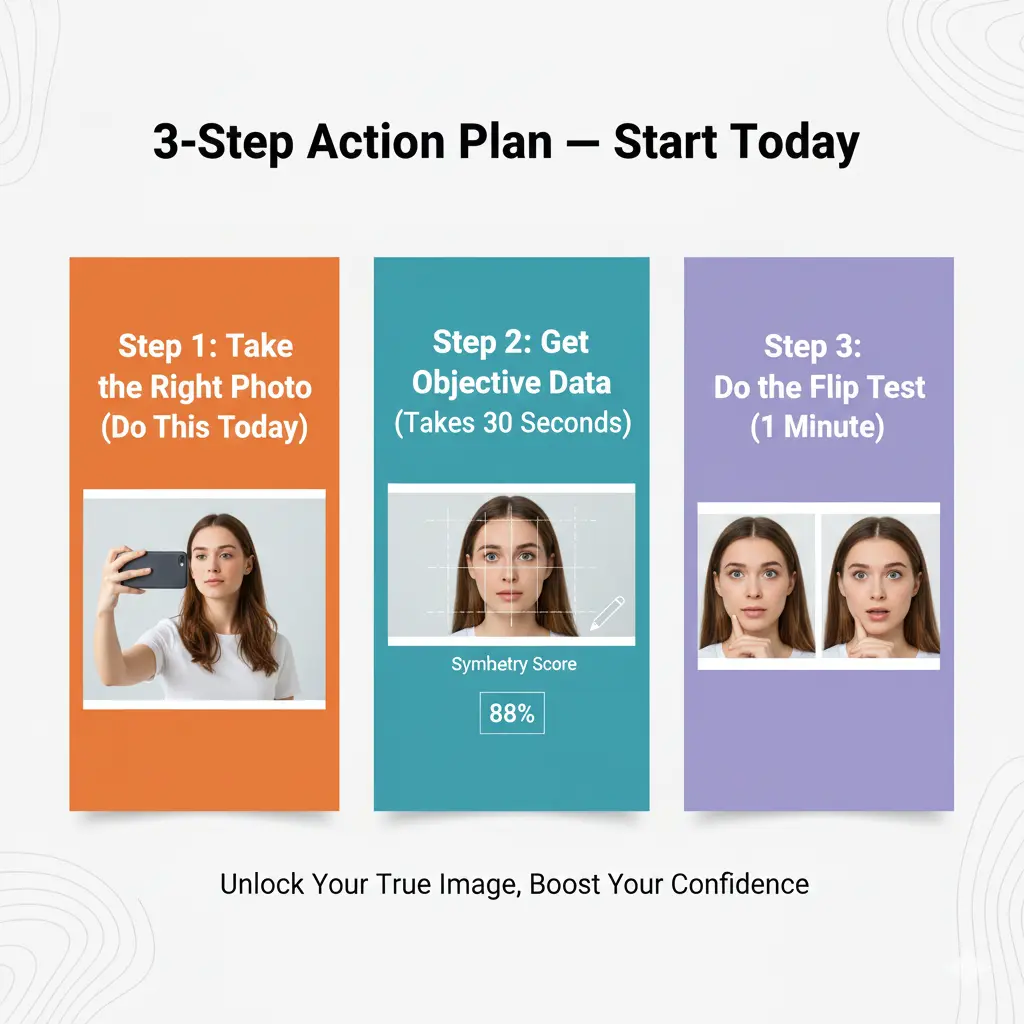
Your 3-Step Action Plan — Start Today
 3-step action plan to use photo wisely
Stop wondering and start knowing. Here's exactly what to do:
3-step action plan to use photo wisely
Stop wondering and start knowing. Here's exactly what to do:
Step 1: Take the Right Photo (Do This Today)
Ask someone to photograph you using:
- Rear camera
- 5-6 feet distance
- Eye level
- Natural daylight
This is your baseline "true appearance" photo.
Step 2: Get Objective Data (Takes 30 Seconds)
Upload that photo to Face Symmetry Test. You'll receive:
- Your symmetry percentage
- Analysis of specific facial areas
- Comparison to population averages
No more guessing. No more anxiety. Just facts.
Step 3: Do the Flip Test (1 Minute)
Take your photo and flip it horizontally. Compare both versions. Notice which one feels more "comfortable."
If the flipped version looks better, your discomfort with photos is mostly unfamiliarity—not actual flaws.
What to Expect
- Within 24 hours: You'll understand exactly why your photos look different from your mirror
- Within 1 week: Photo anxiety starts decreasing as you use better techniques
- Within 1 month: You'll develop a more objective, healthier relationship with your appearance
📖 This article is part of our Complete Guide to Face Symmetry
The Bottom Line
Let's recap what you've learned:
- Mirrors flip your face — You've never seen your "true" reflection; you've seen a reversed version
- Front cameras distort your face — Wide-angle lenses at close range make features look larger and faces look wider
- Your brain prefers familiar things — You like your mirror image more because you see it constantly
- Neither is perfectly accurate — The closest to "how others see you" is a rear camera photo from 5+ feet away
- Most "flaws" are camera artifacts — Many concerns about facial features only exist in distorted selfies
The next time you take a photo and think "That doesn't look like me"—you're right. It probably doesn't.
But here's the good news: the people who know you don't see the distorted selfie version. They see you in 3D, in motion, with natural lighting and expressions. And that version is far more attractive than any frozen, wide-angle, 2D snapshot could ever capture.
You look better than your front camera suggests. Much better.
Now go take a proper photo and see for yourself.
Ready to see your face objectively? Take the Face Symmetry Test →